Setting up a project in Google Cloud Console
Create a new project in Google Cloud Console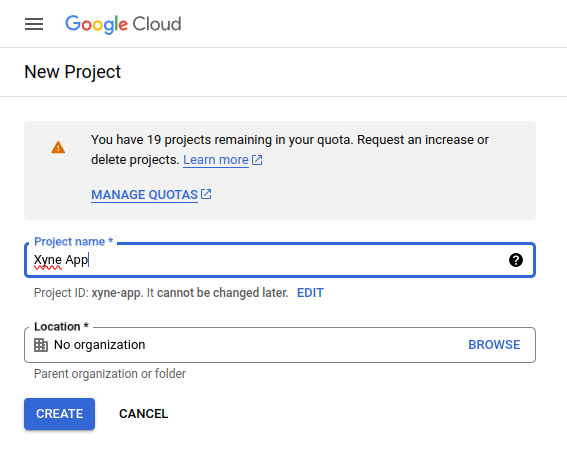
Setting up the Oauth Consent Screen:
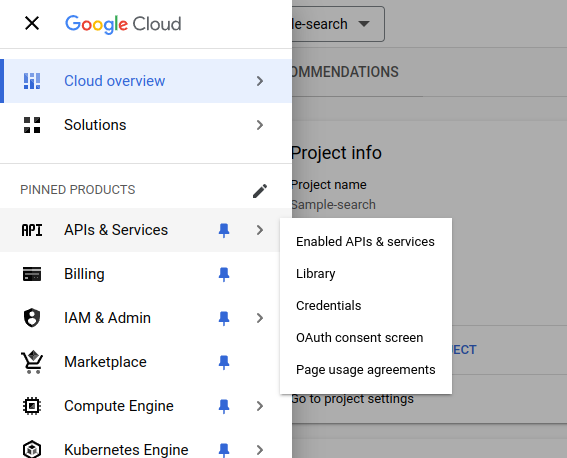
First step after creating the project is to setup the OAuth Consent Screen.- For this navigate to the OAuth Consent Screen in the Sidebar of your Google Cloud Console :
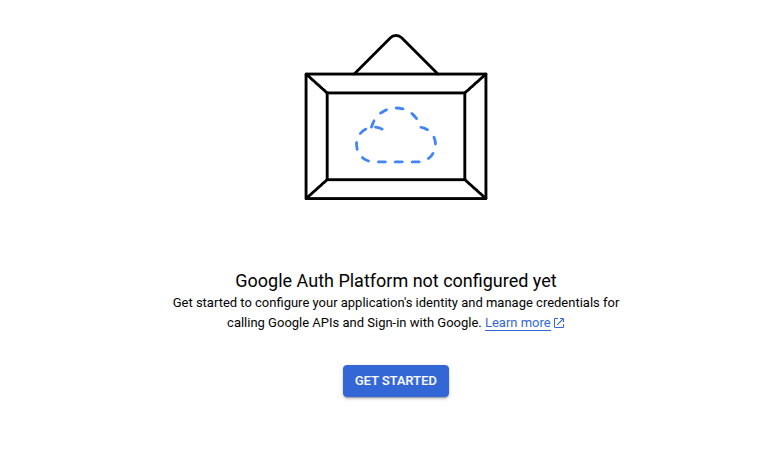
- Under the Oauth Overview screen, click on
Get Startedbutton.
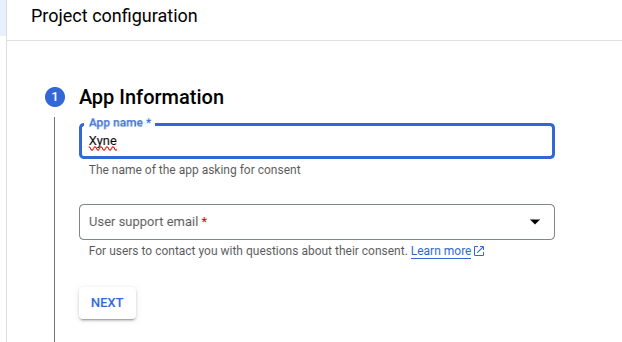
- Under the
App InformationSection, fill out the details :- Provide a Name for the app (For ex: Xyne)
- Provide a User Support email (For ex: your-email@gmail.com)
-
Click on
NEXT. -
Under
Audiencesection selectInternal:
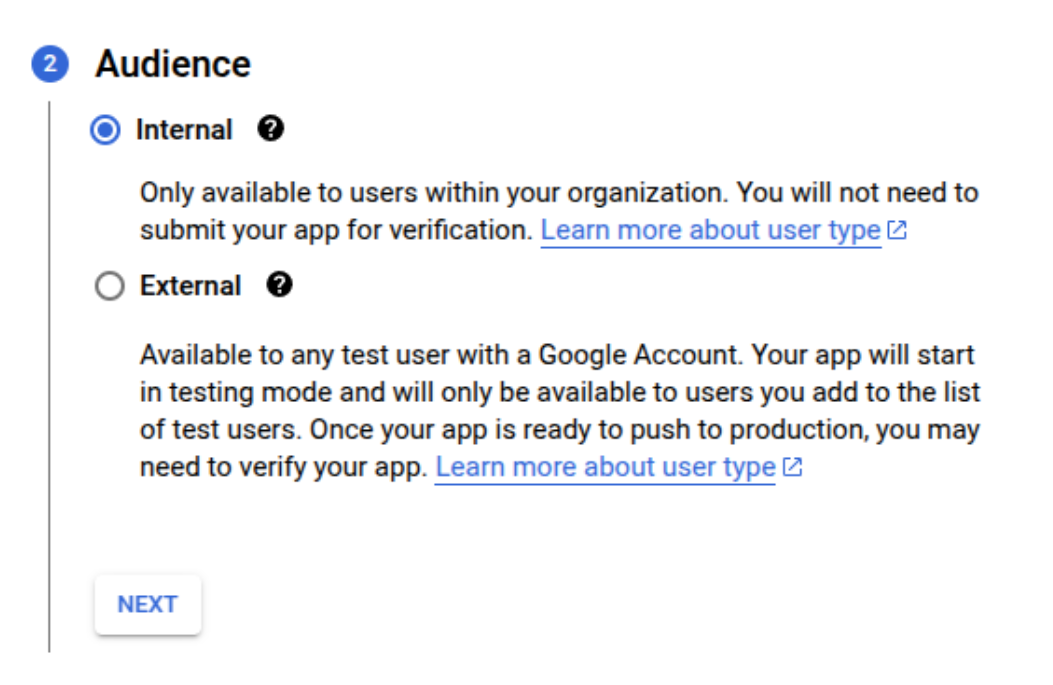
-
Click on
NEXT. -
Under
Contact Informationgive the developer email. (For ex: your-contact@gmail.com)
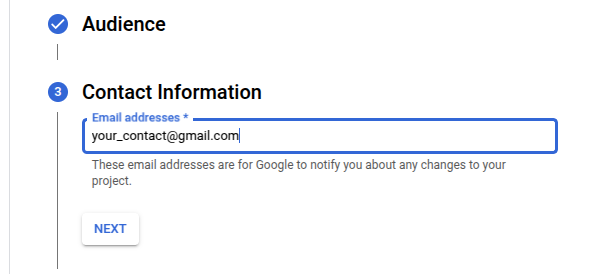
-
Click on
NEXT. -
Under the
Finishsection click on the checkbox to accept Google’s User Data Policy.
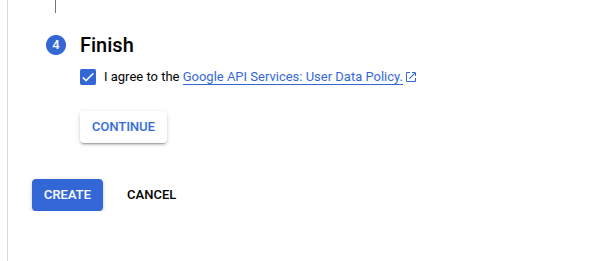
-
Click on
CONTINUE. -
Click on
CREATE.
Setting Scopes :
- Now navigate to the
Data Accesssection on the left-side menu.
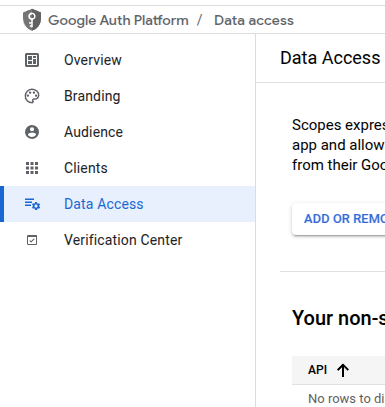
- Under the
Scopessection you’ll see theAdd or Remove Scopesbutton. Click on that:
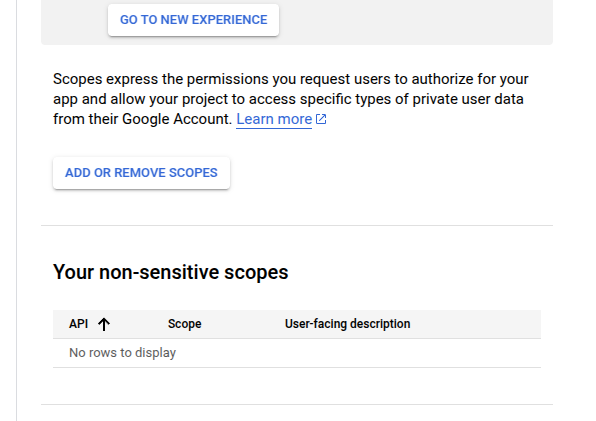
- For now in the scope section only add
/auth/userinfo.email,/auth/userinfo.profileandopenid, leave out the rest of it.
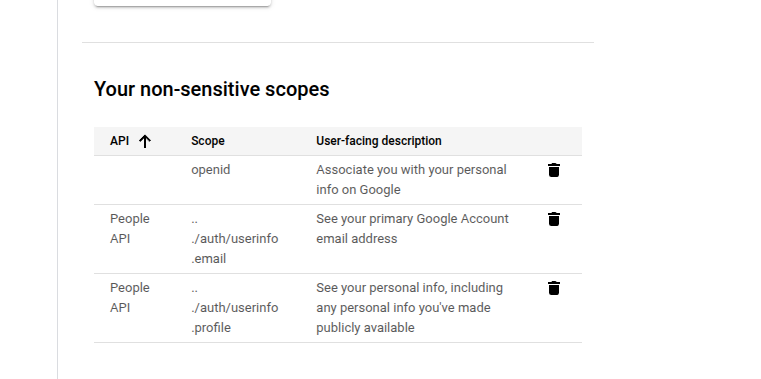
- Click on
Save.
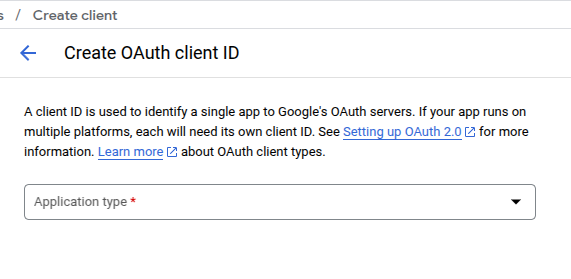
Setting up the OAuth Credentials
- Now, under
Clientssection in the menu on the sidebar,

-
Click on
+CREATE CLIENT, -
Under that you will see
Create OAuth client IDoption.
- Add the type as
Web Application, and give it a name (For ex: Xyne)
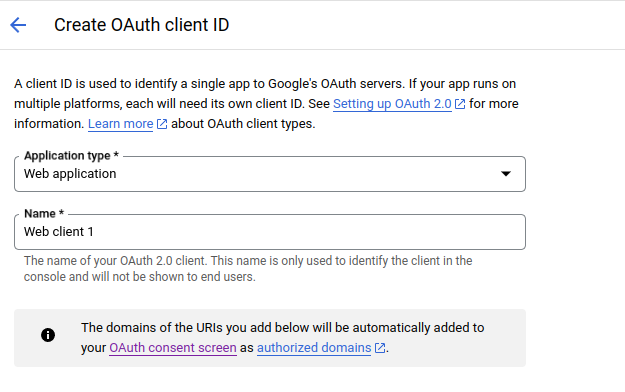
-
Add Authorized JavaScript origins as:
http://localhost:3001for local or replace withhttp://<YOUR_AWS_EC2_IPv4_DNS>for production.
-
Add Authorized redirect URIs as:
http://localhost:3001/v1/auth/callbackfor local setup orhttps://<YOUR_AWS_EC2_IPv4_DNS>/v1/auth/callbackfor production.http://localhost:3001/oauth/callbackfor local setup orhttps://<YOUR_AWS_EC2_IPv4_DNS>/oauth/callbackfor production.
Use
http://localhost:3000 as authorized Javascript Origins. Use http://localhost:3000/v1/auth/callback and http://localhost:3000/oauth/callback when using dev-mode.CREATE and make sure to save the Client ID and Client Secret for putting it in the .env of the application
You can use the following Guides to add your scopes for your project:
Oauth Authentication
Authenticate with Oauth Account.
Service Account Authentication
Authenticate with Service Account.